July 2012

Accessing Local Directories during an Application Update

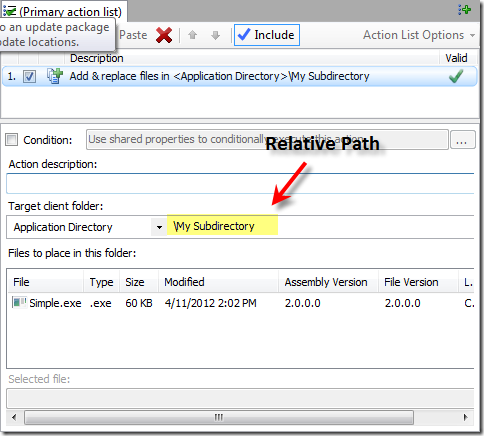
Most application files reside in the installation directory, referred to within AppLife Update as the Application Directory. The AppLife Update execution engine determines the Application Directory from the physical location of the executable that launches the update. When any of the file related update actions are added to an update action list, the default directory that is targeted is the Application Directory.

This is most often the location where files need to be added or replaced during an application update. Accessing paths relative to the Application Directory can be accomplished using the subdirectories property.

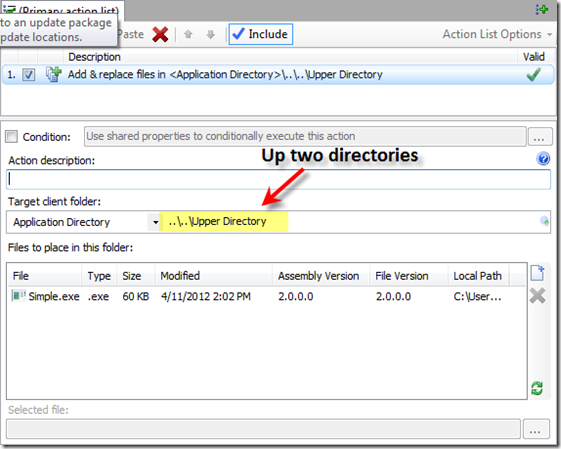
And navigating up the directory tree…

In addition to the Application Directory, you can target any of the well-known named folder locations as well, such as the current user’s profile directories.

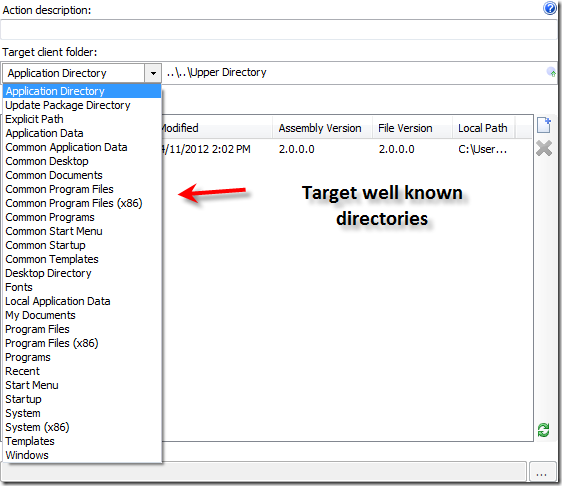
Using an Explicit Path

You’ll notice in the list of directories, there is an Explicit Path option. This option lets you specify the entire path to use for the file action. At first glance, this feature doesn’t look all that useful, but when combined with Shared Properties, it becomes a very nice feature.

Expanding Shared Properties in Place

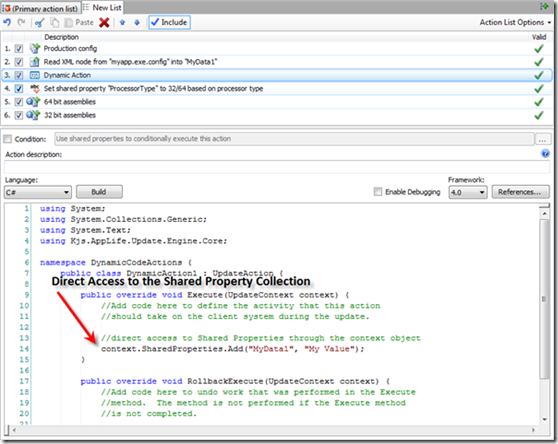
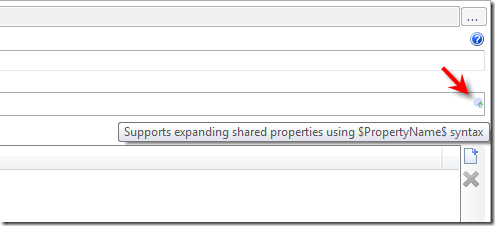
Shared Properties can be used in many action properties. Most of the properties of built-in actions have the ability to expand a Shared Property in place. These properties are adorned with a blue icon indicating their support of this feature. A Shared Property is inserted using $$ delimiters, and during update execution, the value of the designated Shared Property is inserted in-place of the delimiter.

So for file actions, we can use a Shared Property to target an explicit folder, which opens up lots of possibilities because Shared Property values can be passed in from the host application, set by other update actions that can read from a database, the registry, xml config files, or custom actions running your own code.

An Example–MaintainingOfficeTemplates

Say your application installs templates for Microsoft Office and you need to maintain those templates during an application update. There is a default location for Office templates however this location is user configurable, so it could be different on every system. The default template location is located in the current user’s roaming application directory.

CurrentUserRoamingAppDataFolder\Microsoft\Templates

If the user has specified a custom template location, we can find this path in the registry.

HKEY_CURRENT_USER\Software\Microsoft\Office\14.0\Common\General – UserTemplates

One caveat is that if the user has not specified a custom location, this registry key is not present. So in order to target the correct folder, we’ll need to read the user configured location from the registry, and then use that location with an Add & Replace files action. If the registry value is not present, we’ll also set the default value of this shared property to the correct default location by expanding another Shared Property.

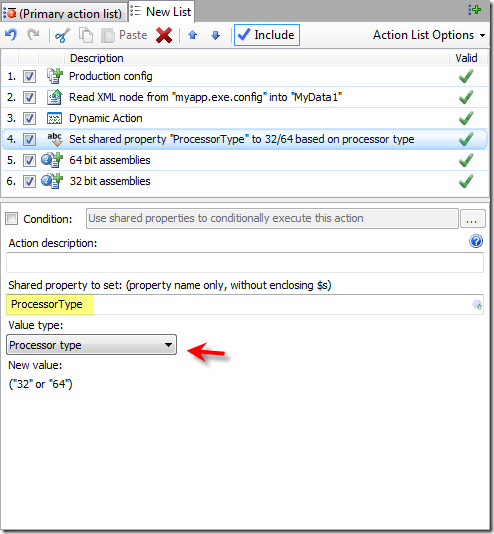
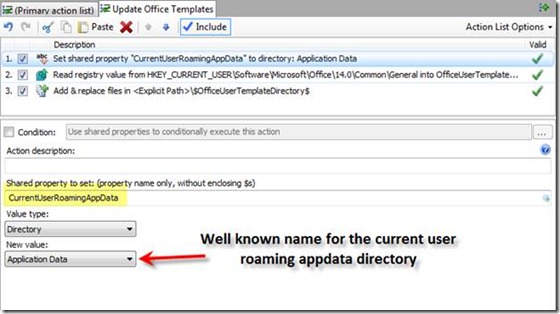
Action 1 – Add a Set Shared Property action and set a Shared Property to the current user’s local roaming AppData folder path. We’ll use this to set the default value in the next action.

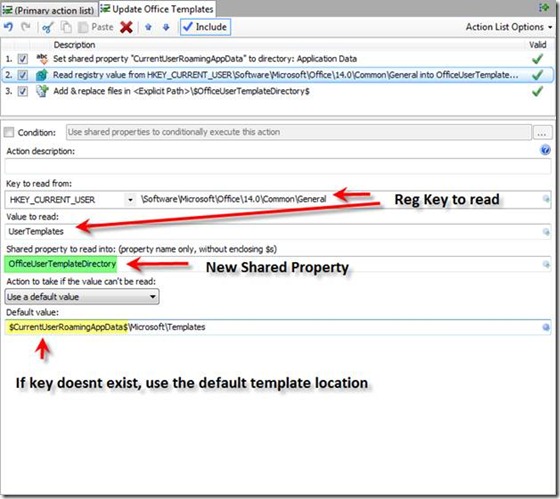
Action 2 – Add a Read Registry Value action to get the User Configured template directory from the registry and assign the value to a new Shared Property. If the value doesn’t exist, we’ll set the default value with the path identified in action 1.

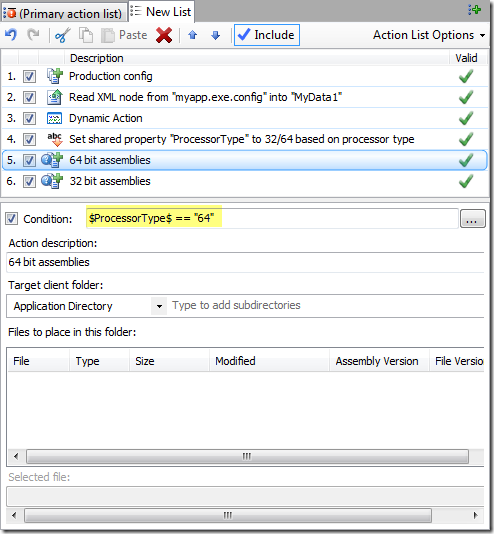
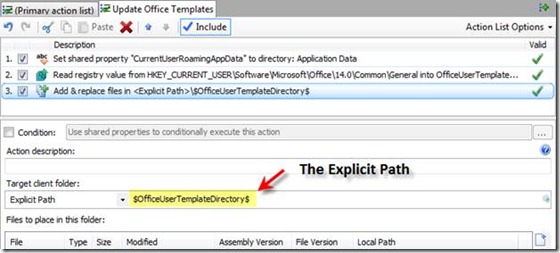
Action 3 – Add an Add & Replace Files action and use an explicit path to target the correct templates folder.

Using Shared Properties and explicit paths, we can easily access and maintain files and assemblies in any local directory that our application uses.

Conditionally Perform Update Tasks using Shared Properties

In order to maintain an installed software application on different hardware and operating environments, it is sometimes necessary to perform update actions based on the conditions at the local site or system. An example of this is when your application uses both 64 bit and 32 bit assemblies. Your installer places the appropriate assembly during initial installation, but in order to maintain that installation during updates we might need to take different action based on the local architecture. Another example might be maintaining different configurations, such as a Dev, QA, or Production installations. We might want to place debug symbols on a dev update, but not in production. Or we might set specific configuration settings differently, based on the environment. With AppLife Update, we can use information from the local installation to conditionally control the actions taken during the application update. We accomplish this by defining and setting Shared Properties based on the local system information and then using those Shared Properties to conditionally execute update actions.

Shared Properties

The AppLife Update engine execution context hosts a collection of name/value pairs, and this collection is named the Shared Properties collection. Shared Properties can be accessed by any Update Action in the update action list, hence the name Shared Properties.

Shared Properties can be defined and set in a many different ways. The initial collection of shared properties can be passed into the update context from the host application. The ApplyUpdate method of the Update Controller has an overload that takes an IDictionary object of string values. The contents of this object are used to populate the collection of Shared Properties.

1:  Dictionary<string, string> sharedProperties = new Dictionary<string, string>();  
2:  sharedProperties.Add("MyData1", mMyData1);  
3:  this.updateController1.ApplyUpdate(ApplyUpdateOptions.None, sharedProperties);  

If you are using the built-in user experience controls, your code doesn’t call the ApplyUpdatemethod directly. All of the user experience controls have a property called InitialSharedProperties that can be used to add values to prior to applying an update.

1:  updateDisplay1.InitialSharedProperties.Add("MyData1", mMyData1);  

Many of the built-in update actions that read information can set shared properties. The Database actions can read query results into a shared property. The Read Registry Value action, Read Xml Node action, and the Set Shared Property action can all set shared property values. Custom actions, most easily created using the C#/VB.Net dynamic code action, can access the Shared Properties collection directly through the context parameter.

It’s worth noting that while most of the actions read and write string values to the Shared Properties collection, custom actions can set and access any object data.

Conditional Updating Based on Shared Properties

Say we want to replace 64 bit or 32 bit assemblies, depending on the architecture of the system being updated. To accomplish this, we’ll add two Add & Replace files actions to our update action list, and then conditionally execute each action based on the value of a Shared Property. We can define the Shared Property with a Set Shared Property action. Processor type is one of the values that are available to set using this action. We’ll name the Shared Property ProcessorType.

After the action executes, the Shared Property named ProcessorType will contain a value of either 32 or 64, based on the current processor architecture. We can now use this value in the Conditional Statement of the two file actions.

This action will only be executed if the value of the ProcessorType Shared Property is “64”. The conditional for the 32 bit assemblies is obviously “32”. By using a Shared Property and conditional statements, we can use local system information to control the execution of the update.

Updating Software Operating on Erratic and Unreliable Networks

Download:
Example Project Source Code

When your software operates in an unreliable networking environment, it can be very challenging to automatically maintain your software installation. These environments are quite common. Police cruisers and ambulances use laptops to run software in the field, relying on cellular technology to distribute updates. Traveling salesmen use proprietary laptop business software and are constantly going in and out of network coverage. Medical staff use their mobile pc’s in large medical facilities, where dropping connections in elevators and dead Wi-Fi spots is common place. In scenarios like these, professionals are using software that must be maintained. In today’s professional environments, software maintenance is expected to “just happen”, without interrupting the work of the professionals using the software. Software publishers who create software that operate in environments like these all face the same challenge of maintaining their software without requiring support staff to take possession of the hardware. The AppLife Update Solution provides the answer for many software publishers whose applications operate in environments like this.

With the AppLife Update solution, software publishers create and publish self-contained update packages that migrate an installation from one version to another. These update packages are retrieved by the client software when network connectivity is present. Once the update package is retrieved, network connectivity is no longer required and the update can be applied, performing the work necessary to maintain the deployed installation. As the update package is downloaded, the partial download is cached locally so that any interruption in network connectivity will not require restarting from the beginning.

The flexibility of the AppLife Update solution provides the ability to change the behavior based on known circumstances. When it is known that the software being maintained is going to operate in an unreliable networking environment, it is possible to handle network connectivity errors differently than normal. Normally a network connectivity error would be unexpected and the user would be notified of the situation. Instead, the application can postpone the update retrieval operation for a short period of time and try again. And try again. And try again, until the update retrieval succeeds and can be applied.

Example Implementation

In the example project accompanying this post, the updating functionality is completely automated. The implemented updating process can be described as:

When the application launches, a background update check is performed. If an update(s) is available, the update packages are retrieved in the background and without user interaction. If network connectivity is lost, the retrieval is postponed and continually retried in the background without user interaction until the update is successfully retrieved. Once retrieved the user is prompted to either apply the update now, or when the application is closed. If the user elects to apply the update, the update is applied and the application restarted. If the update is deferred until the application exits, the update is applied as the application exits and the application is not restarted.

The example project contains an Updater class that controls the update check and retrieval process. Inspecting the Updater class, you’ll see that the class maintains an AppLife Update Controller and uses the API methods and events of the update controller to pause and retry as network errors occur. When an update package is successfully downloaded, an event is raised, alerting the primary application that an update is ready to be applied. The implementation code in the primary application is very simple. An Updater class is instantiated and the Update Controller properties are configured. Once configured, the GetUpdateCompleted and GetUpdateProgressChanged events are hooked before calling the GetUpdateAsync method. That’s it. Any updates will be retrieved as the network allows. When the completed event fires, the Updater status is checked and the user is prompted to apply the update now or when the application exits.

Implementation Details

The Updater class is the heart of the implementation. It has a very simple interface:

The Updater class wraps an AppLife Update Controller and exposes a single method that implementing code will call to perform the entire update process.

We want to take a look at the GetUpdateAsyncmethod. This method calls the Update Controller’s CheckForUpdateAsync method and then returns. The update process continues in the CheckForUpdateAsyncCompleted event handler. If an update is present, the DownloadUpdateAsync method is called. When the download completes, the GetUpdateCompleted event is raised. When these asynchronous methods are called, any network errors will cause the completed event to fire, and the event argument’s Error property will indicate the cause of the error. Based on the error information, we can take appropriate action. In this example, we are considering any WebException or IOException to indicate a network error. Your implementation can improve on this, based on environment specifics. At any rate, when a network error is detected, the updater class goes into a wait mode and try’s the check/download again after a period of time. Eventually, the update download is completed, and the GetUpdateCompleted event is raised, triggering the client application to prompt the user.

Of course, the user experience behavior is completely customizable with just basic coding. The AppLife Update Controller performs the heart of the technical challenges involved in this implementation, and the Update Engine is what lets you package up any work that is necessary to maintain and migrate your deployed installations. So I invite you to take a look at the example and evaluate it for suitability in your own environment. Feel free to contact our technical support team with any questions.

Scroll to Top